So at long last I have set up the irrigation system, well overdue. Being a totally south facing garden we and it bakes so I spend a long time watering and even in the late evening it can be very hot.
After much research, mainly due to financial restraints, as there is only so much money I could spend. I chose a micro jet spray system from Easy Garden Irrigation.
With the help of hubby, we drew up a plan of the garden, initially planning to only do one side of the garden, ordered the medium kit which came relatively quickly bearing in mind Covid19, then set it up.
I thought I had taken a pick of the box when it came but I can't find it anywhere? Basically it had the following in

Professional pressure reducer 175 kPa
10 x 180 degree Vari-jet stkes with tube
2 x Vari-flow 90 degree micro jet heads
2 x 360 degree micro jet heads
1 x nut and tail adaptor
2 x T connectors
4 x elbow connectors
3 x stop ends
10 x supply pipe stakes
1 x 25 metre irrigation supply piep
10 x micro blanking plugs
5 x supply pipe nail in wall clips
I laid the pipe out, as instructed, in the sun, which we had plenty of, to warm up and make a bit easier to fit. Initially I was going to set it up watering the bed from back of the bed to the front, but it actually turned out easier to set it up front to back.
The first thing is the pressure reducer. We actually have excellent water pressure so I knew we needed this.

I then lay out the pipe all down the right hand side of the garden

you then work out where to put the vari-jet spikes, after reading up its roughly every 2 metres but I put them slightly closer together to allow for an over lap and no gap at the back where the two spray arcs would have not met. Use the gadget supplied to pierce the pipe push the vari-jet attachment in, pop it in the ground and with any luck it should work and it did.
I ran it for about 1 hour each evening and was thrilled as to how well it did,doing the whole of one side in just the hour was amazing, so decided I needed to set up the other side of the garden as well.
Now this needed something more than just the irrigation system as I had to get it across the path and a pipe lieing across the path does not work for me, especially when my husband is so clumsy and would either walk on it or trip over it.
So after a visit to a garden centre once they were open of course, I set up an arch.

I'm rather pleased with it, I have planted a Kiwi Fruit, mainly because it has such pretty leaves, to grow up it.
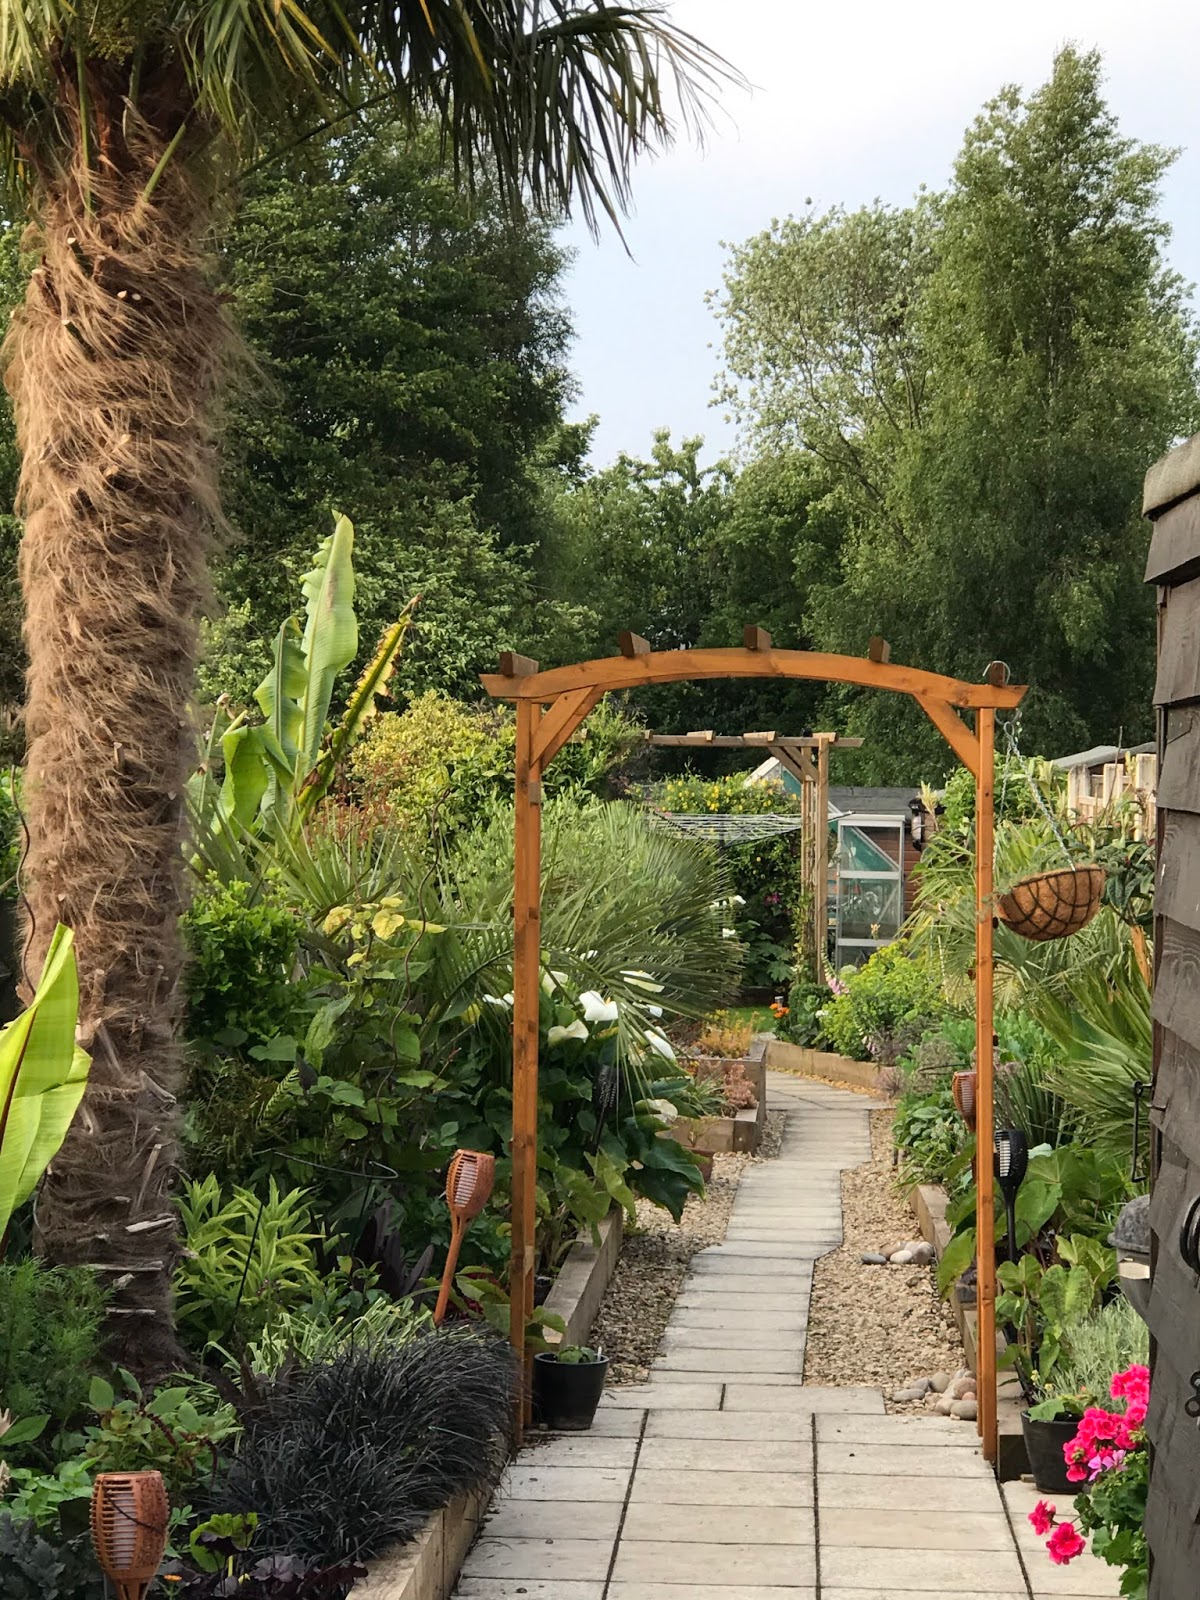
It will be relatively easy to set up trellis to the right if it needs further to grow, then it can trot off down the fence.
So now I have the frame to guide the pipe over. This time I didn't go for a kit I just ordered the extra bits I needed as I still had some left over from the first kit. So using a 't' junction piece I cut the pipe, and sent it off over the arch.

its currently tied with string because I cannot find the cable ties anywhere??


it now waters both sides of the garden.

You can just about make out the spray

I have ordered a timer so it will come on automatically.

What used to take me hours each evening and probably used lots and lots of water is all done in 1 hour and I don't even have to be there!

I think my only concern is, once all the plants have grown is the water going to reach the back of the beds? Well we will have to wait and see.
Of course since I fitted it we have had lots of rain!!! I think its called 'sods law'!
I have also been doing my 5 yearly paint of the front door, which did not turn out as well as I had planned.
I had wondered as it was starting to show signs of wear and tear, but once I started stripping, it turned out to be a far worse than expected.

Even with wood hardener it was still soft.

To be honest it doesn't owe us a penny. We can't remember exactly when it went in but we do remember who fitted it for us and we think it was at the same time as when we had the new wooden windows fitted so we are talking 20-25 years ago.
So I have done a bit of a bodge job, whilst we buy a new door .

It looks ok but it will not get us through another winter. The challenge now is to match the yellow. I can do the painting, but I'm not getting any younger (sadly) and I found it really hard this time, its not light to lift so we have decided to go with a 'composite' door. I said to hubby we could go navy, but to be honest I love my yellow door, its bright, cheerful and welcoming. Fortunately he agrees, so the search begins. I will keep you posted.
More next time x
No comments:
Post a Comment
Thank you for visiting my blog. Please let me know what you think, and that you have visited. If we met in real life I would offer you cake and coffee or tea x